‣ Medical Questionnaires/Reservations flow
(0.Browser settings, etc.)
1. Login to the Medical Checkup Reservation System
1-2. UTokyo Account Login
2. Answer Questionnaire
3. Make a Reservation
3-1.Make a Reservation
*If you are continuing to make a Reservation after answering the medical questionnaire, please proceed from step 2 below.
- 1.Click "Questionnaires / Reservations" → "Questionnaires / Reservations"
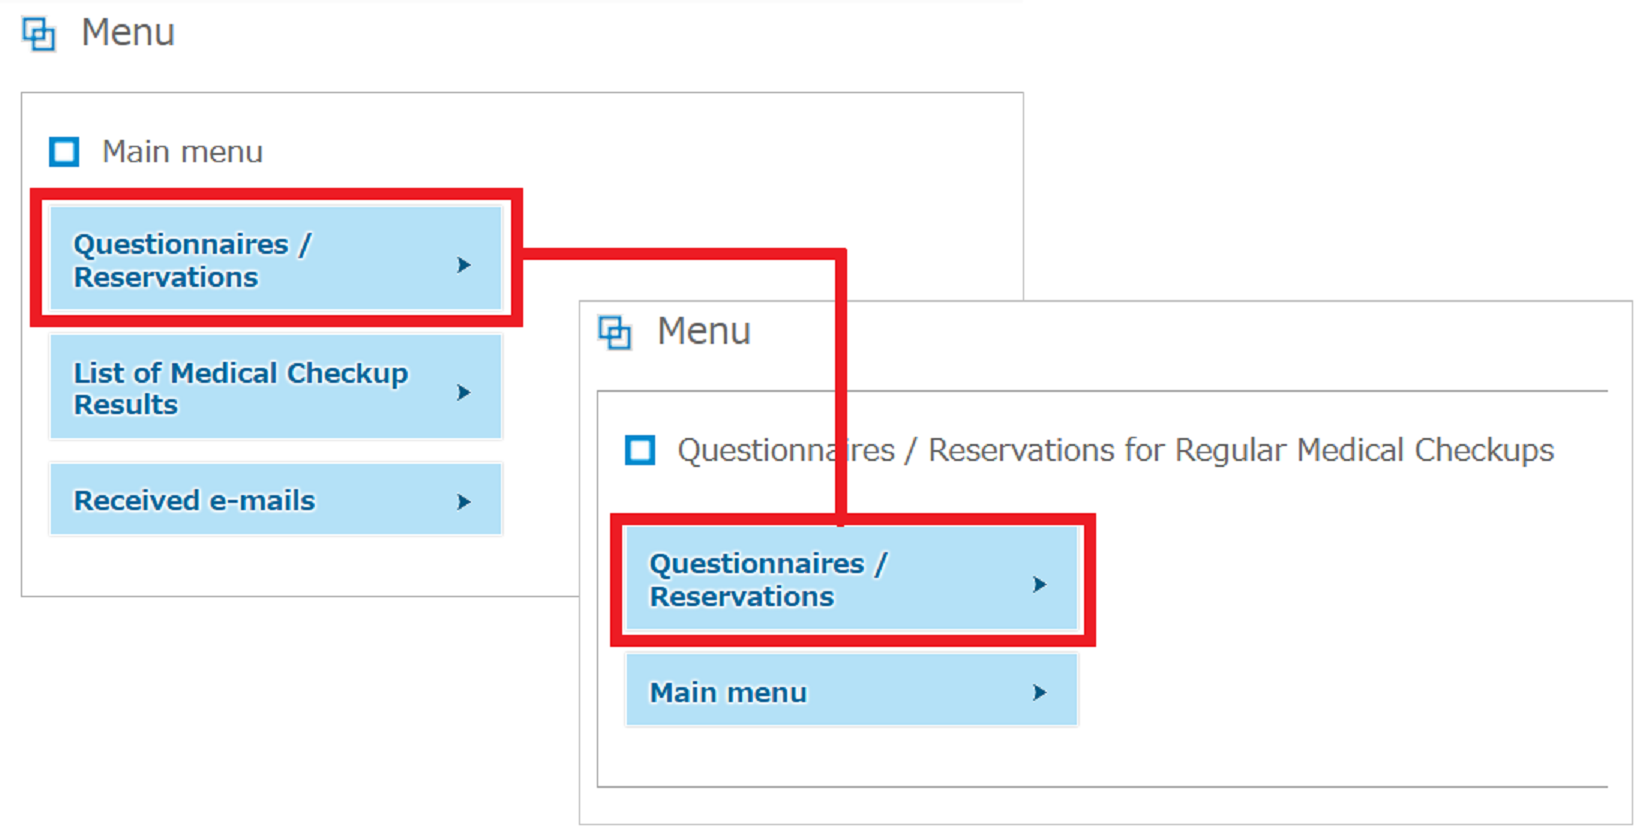
▼ If you are continuing to make a Reservation after answering the medical questionnaire, please proceed from the steps below.
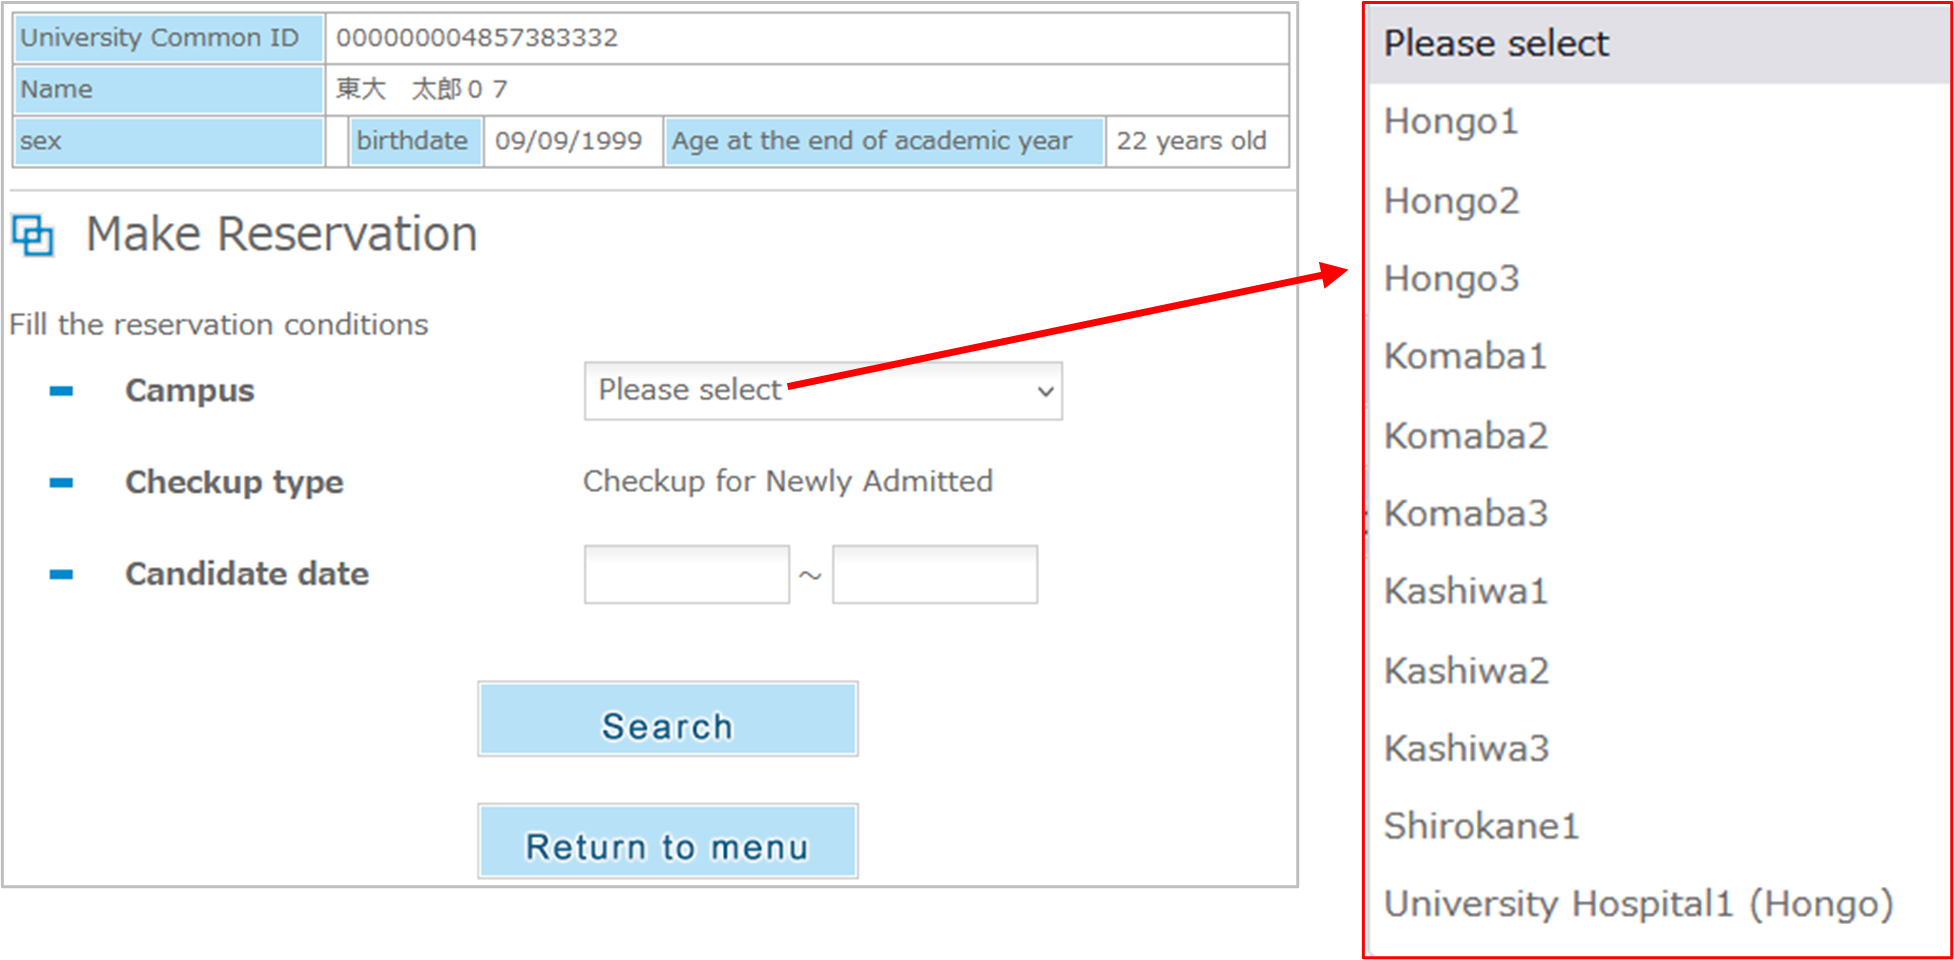
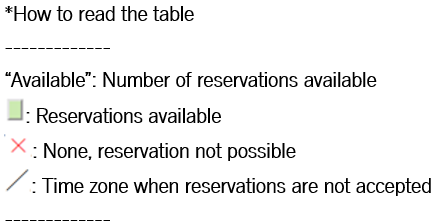
- 2. Please select the correct district name written on the medical examination guide you received.
* For those who are informed that their campus name is "Hongo 1", will not be able to make reservations if they select "Hongo 2". - 3.Enter your desired date (start to end) and press the "Search" button.
* If an error is displayed, please review the reservation conditions and press the "Search" button again.
* If the schedule selection range is too wide, it may take some time to update the display. Search using few days at a time will make things smooth.
- 4.A green button will be displayed in the date field where you can make reservations, so please click on the button.
- 5.When you click the green button the following screen will be displayed. If there are no problems with the reservation details, click "OK". If they are incorrect, click on "キャンセル".
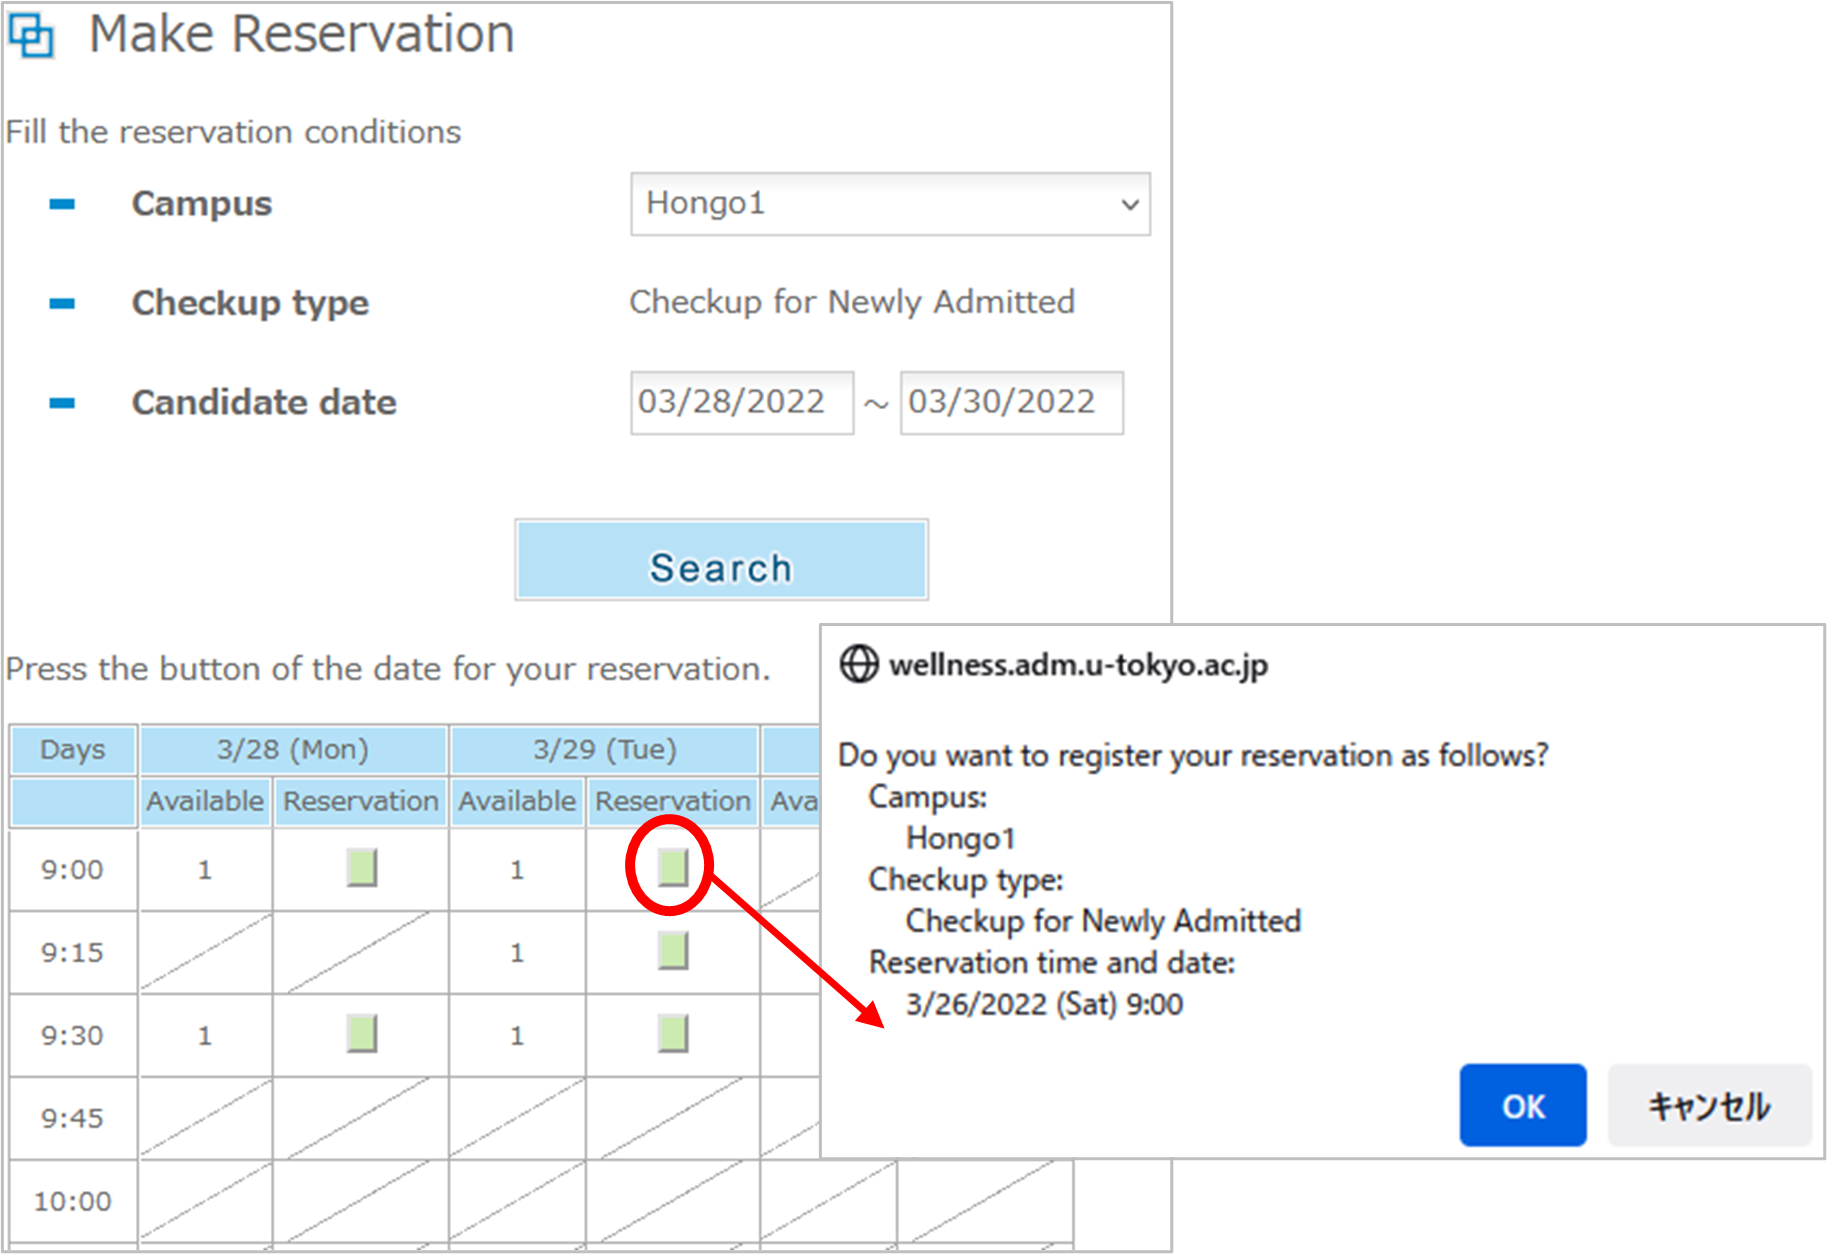
-
- 6.When you click "OK", the following screen will be displayed. A reservation completion email will be sent to the specified email address.
* You can also check from "Mail reception history" in the menu.
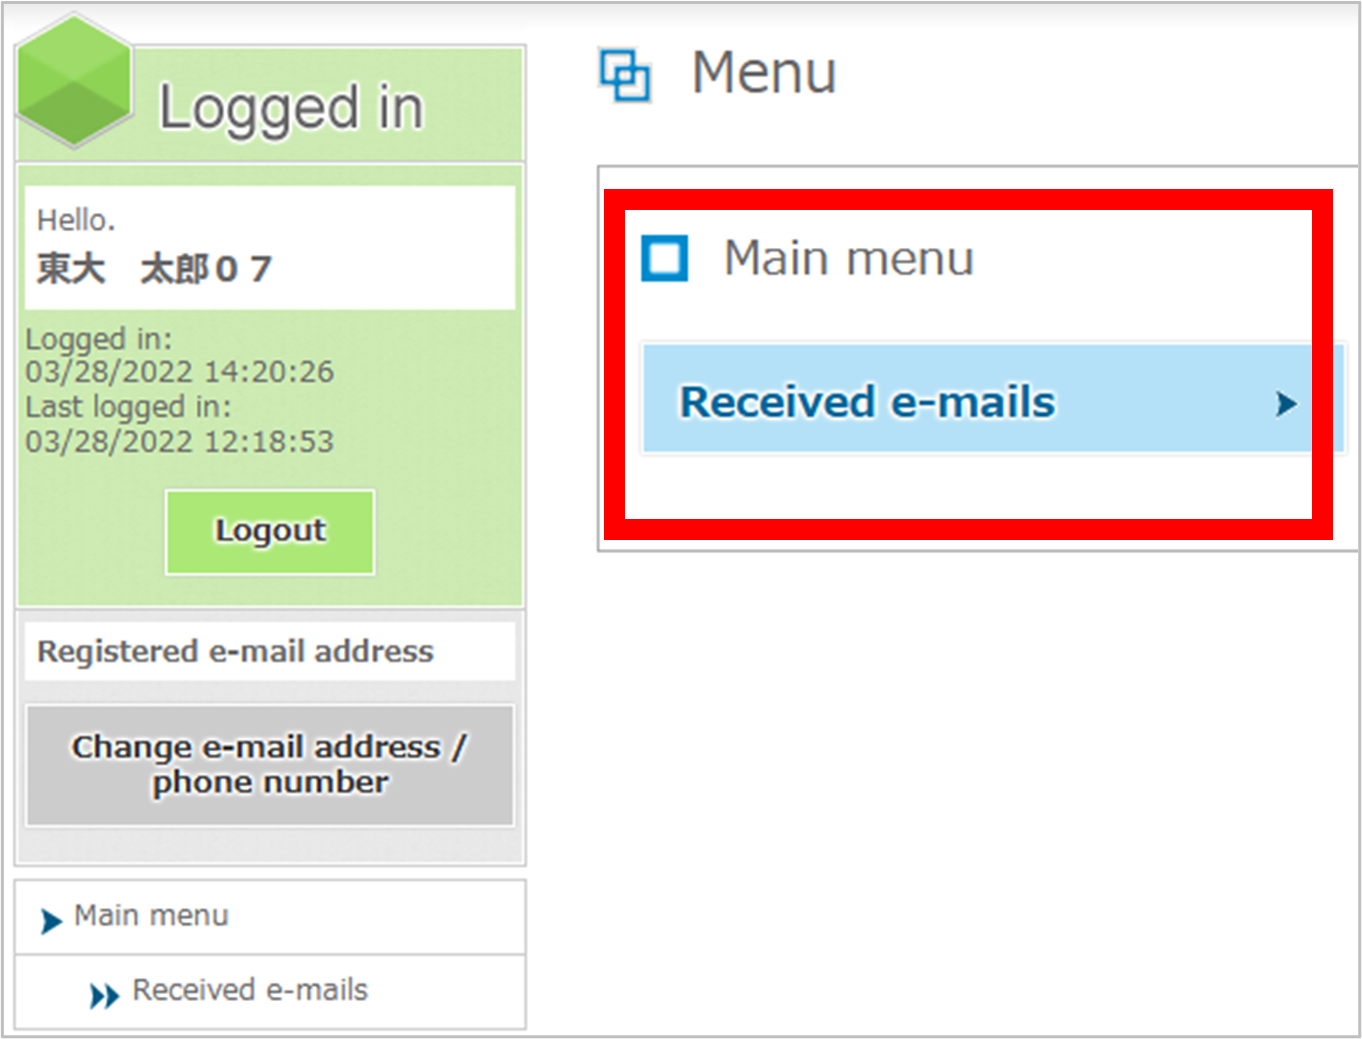
* If you cannot answer the questionnaire or make reservations because only the "Received e-mails " is displayed in the main menu as shown below, please contact the Health Service Center on your campus. (here)
3-2.Make a Reservation(Change / Cancel / View)
・Press the desired button from the menu.
*Reservations can be changed (①) or canceled (②) until the day of the medical checkups appointment.
*If the examination date has passed without having taken medical examination, cancel your reservation (②) and then re-book.
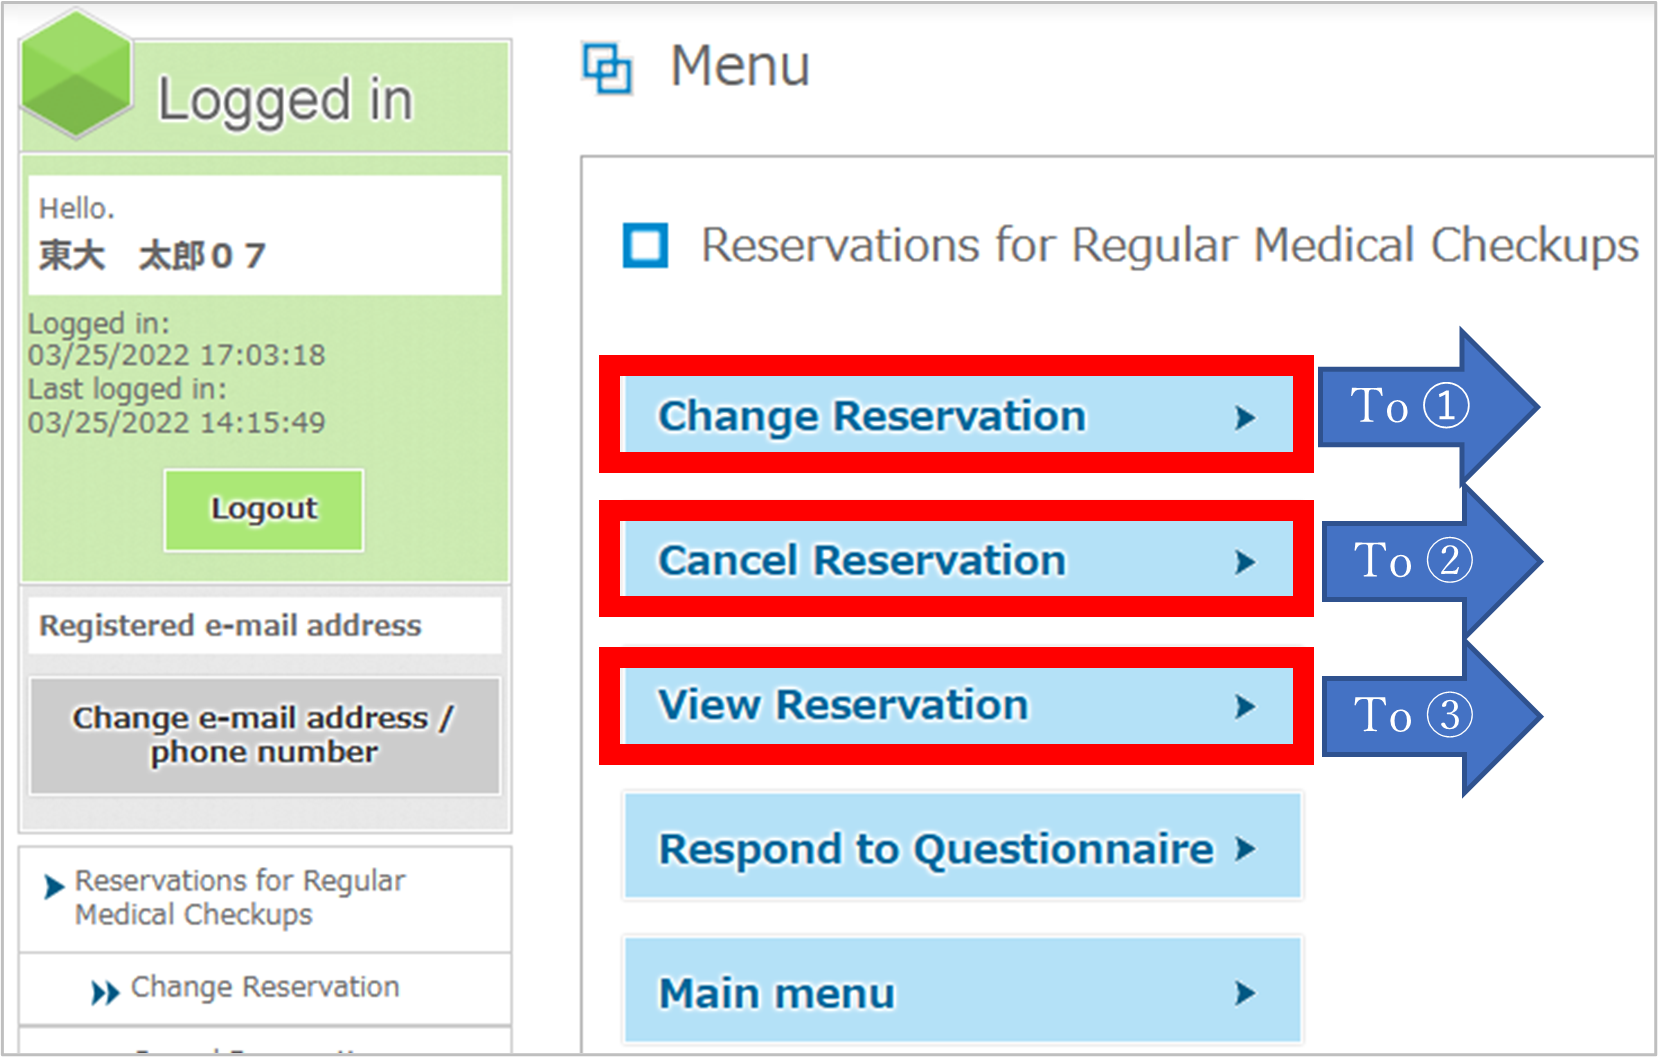
➀ Change Reservation
- 1. Please select the correct district name.
- 2.Enter your desired date (start to end) and press the "Search" button.

- 3. A green button will be displayed in the date field where you can make reservations, so please click on the button.
- 4. The details of the reservation change will be displayed. If there are no issues with the reservation details, please click "OK".
- 5. To make a new reservation click on the "Register Reservation" button and the screen will switch to the reservation application screen. Please follow the necessary steps to make a reservation.
② Cancelling a Reservation
- 1.When you press the "Cancel" button, the following dialog will be displayed. Click the "OK" button to cancel the reservation, or click the "キャンセル" button if you do not wish to cancel.
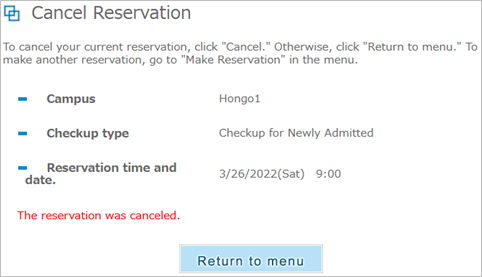
- 2.When the cancellation process is completed, the message "The reservation has been canceled." will be displayed on the screen and an email will be sent to the email address you specified confirming the cancellation.
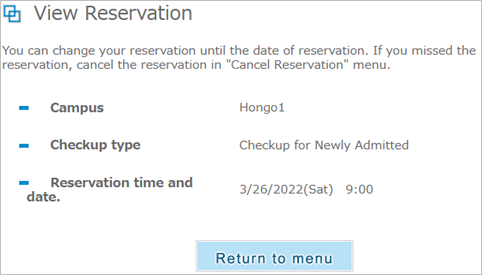
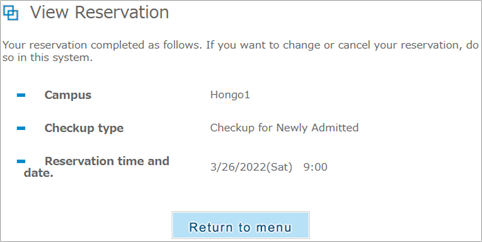
③ View Reservation
Your current reservation information will be displayed.